Agricultural Literacy Curriculum Matrix
Lesson Plan
Drones in High-Tech Farming (Grades 3-5)
Grade Level
Purpose
Students discover the science behind how a drone works, explore how drones are used in agriculture, and program and operate a drone for the purpose of surveying a field. Grades 3-5
Estimated Time
Materials Needed
Engage:
- Gymnasium or large field free of trees or overhead wires
- Quadcopter drone (We tested the Ryze Tello drone. If using a different drone, feel free to adapt the instructions to meet your drone's specifications.)
- Piece of cardboard, wood, foam, or rubber mat for drone takeoff and landing (optional)
Activity 1: How Does a Drone Fly?
- Hair dryer
- Ping pong ball
- 2" x 6" piece of paper, 2 per student
- Paper clip, 1 per student
- Scissors
- Rulers
- Quadcopter drone
- How Do Drones Fly? video
Activity 2: Drones in Agriculture
- Agricultural Drones by Simon Rose, 1 per group
- Agricultural Drones Discussion Guide, 1 per student
- Agricultural Drones Discussion Guide Answer Key
- Blank 8 1/2" x 11" pieces of paper, 1 per student
- Crop Troubleshooting Cards
- Scissors
- Glue sticks
Activity 3: Drone Mission
- Gymnasium or large field free of trees or overhead wires
- Drone Mission Activity Packet, 1 per student
- Brown or black poster paper, 4 pieces
- Crop Problem Signs
- Quadcopter drone
- Piece of cardboard, wood, foam, or rubber mat for drone takeoff and landing (optional)
- Smartphone or tablet
- DroneBlocks App
- Crop Troubleshooting Guides from Activity 2
Vocabulary
drone: an unmanned aircraft guided by remote control or onboard computers
force : a push or a pull on an object
Global Positioning System (GPS): a space-based satellite navigation system that provides location and time information in all weather conditions, anywhere on or near the Earth
gravity: the natural force that causes things to fall toward the Earth
hover: remain in one place in the air
lift: the force that directly opposes the weight of an aircraft and holds the aircraft in the air
pitch: the movement of a drone up or down on a lateral axis
precision agriculture: an information technology-based, site-specific farm management system that collects and responds to data ensuring that crops receive exactly what they need for optimum health and productivity
propulsion: the force that moves something forward
quadcopter: a drone with four rotors
remote control: a device used to control machines from a distance
roll: rolling movement of a drone sideways left or right on a longitudinal axis
rotor: a set of rotating blades that turn around a central point and lift an aircraft off the ground
satellite: a spacecraft placed in orbit around the Earth, moon, or another planet used to send signals and information as part of a communications system
survey: to measure and examine an area of land
thrust: the force that causes an aircraft to move forward
yaw: rotating movement of an aircraft clockwise or counterclockwise on a vertical axis
Did You Know?
- The Association for Unmanned Vehicle Systems International predicts farms will eventually account for 80 percent of the commercial drone market.6
- Drones were originally designed for military purposes to replace humans on missions that were considered too dangerous, but today they are used for scientific research, agriculture, recreation, surveillance, police work, storm tracking, search and rescue, photography, filming, and racing.7
- Drones were banned in all US National Parks after a tourist crashed one into a hot spring in Yellowstone National Park.7
Background Agricultural Connections
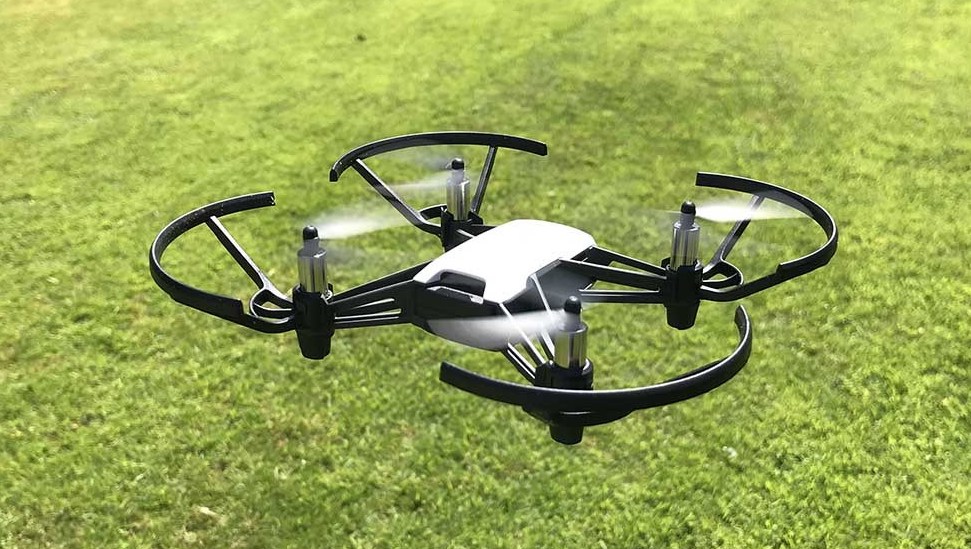
A drone, also known as an unmanned aerial vehicle (UAV), is an unmanned aircraft guided by remote control or onboard computers. Most agricultural drones have either fixed wings or rotors. Drones with four rotors are called quadcopters.
Drone applications in precision agriculture include mapping, surveying, monitoring, planting, crop dusting, and spraying. Drones can increase yields, save time and money, and assist with animal and crop monitoring, planning, and management. The birds-eye-view of a drone can improve production, efficiency, and yields by identifying small problems before they become big problems. Real-time footage can prevent costly losses and ensure the success of the crops.
Drone map creation provides farmers with an accurate view of their fields. Drones equipped with near infrared camera sensors allow the drones to see the spectrum of light that plants use to absorb light for photosynthesis. Using this information, farmers can identify the health of their crop. Drones can create detailed Global Positioning System (GPS) maps for planning the location of planting to maximize land, water, and fertilizer usage.1 Precise soil analysis maps produced by drones help direct seed planting patterns, irrigation, and nitrogen-level management. Nutrients, moisture levels, and overall crop health is monitored in real time by drones equipped with hyper-spectral, multispectral, and thermal sensors. Scanning crops with visible and infrared (IR) light, drones can identify plants infected by bacteria or fungus, helping to prevent disease from spreading to other crops. This technology enables detection of some diseases before they are visible to the human eye.2
Drone cameras can take high-resolution images with clear detail. Drones equipped with thermal cameras can assist with irrigation decisions by identifying areas of pooling water or insufficient soil moisture. Thermal imaging cameras can also monitor livestock by checking the herd for injured, sick, missing, or birthing livestock. Drones provide greater resolution than satellites or airplanes because they can be flown lower and more precisely.3
Crop spraying drones can carry fertilizer, herbicides, pesticides, or fungicides in large liquid storage reservoirs. Applications using drones are less expensive than manual vehicle applicators or crop dusters. Drones follow pre-mapped flight paths and spray crops with precision and accuracy, which can reduce waste and over spraying.
Drones can be operated by remote control or by onboard computers with a preset flight path. The flight path of a drone is created by the user on a ground control device (a laptop, tablet, or smartphone). The line of flying is drawn on a map, and the information is transferred or uploaded wirelessly from the ground control device to the drone. The drone follows this flight path, and the user has the option to perform manual overrides if necessary.
Drones with rotors, like quadcopters, use the rotors for propulsion and control. A rotor is like a fan. Spinning blades push air down. Two of the rotors diagonally opposite of each other are spinning clockwise while the other two rotors are spinning counterclockwise. According to Newton's third law of motion, for every action there is an equal and opposite reaction, all forces come in pairs. As the rotor pushes down on the air, air pushes up on the rotor. In order for the drone to fly into the air, a force that equals or exceeds the force of gravity must be created. This is called lift. The faster the rotors spin, the greater the lift. Drones can hover, climb, or descend. To hover, the thrust of the rotors pushing the drone up must be equal to the gravitational force pulling it down. By increasing the thrust (speed of the rotors), the upward force is greater than the force of gravity and the drone will climb. By decreasing the thrust, the drone will descend.4
Yaw is the rotating of the the drone either clockwise or counterclockwise on a vertical axis. A drone with four rotors can rotate by changing the power to the four rotors. Decreasing the spin of two rotors diagonally opposite from each other and increasing the spin of the other two rotors causes the drone to rotate while hovering.
Pitch is the movement of the drone either up or down on a lateral axis. Moving the front of the drone up requires increasing the rotation rate of the back two rotors and decreasing the rate of the front two rotors. Decreasing the rotation rate of the back two rotors and increasing the rate of the front two rotors will move the front of the drone down.
Roll is the rolling movement of the drone sideways, either to the left or the right, on a longitudinal axis. Increasing the rotation rate of the right two rotors and decreasing the rate of the left two rotors will move the drone to the left. Decreasing the rotation rate of the right two rotors and increasing the rate of the left two rotors will move the drone to the right.
The ascent, descent, yaw, pitch, and roll on most quadcopters can be controlled by the throttle sticks on the remote control or by programming a flight plan.
All drones that weigh more than .55 pounds (250 grams) must be registered with the Federal Aviation Administration (FAA). Unmanned aircraft should stay below 400 feet. Everyone flying drones should follow these basic safety guidelines at all times:
- Keep the drone in eyesight at all times, and use an observer to assist if needed.
- Remain well clear of and do not interfere with manned aircraft operations. See and avoid other aircraft and obstacles at all times.
- Do not intentionally fly over unprotected persons or moving vehicles. Remain at least 25 feet away from individuals and vulnerable property.
- Contact the airport and control tower before flying within five miles of an airport or heliport.
- Do not fly in adverse weather conditions such as high winds or reduced visibility.
- Do not fly under the influence of alcohol or drugs.
- Ensure that the operating environment is safe and that the operator is competent and proficient in the operation of the drone.
- Do not fly near or over sensitive infrastructure or property such as power stations, water treatment facilities, correctional facilities, heavily traveled roadways, government facilities, etc.
- Check and follow all local laws and ordinances before flying over private property.
- Do not conduct surveillance or photograph persons in areas where there is an expectation of privacy without the individual's permission.5
The FAA mobile app B4UFLY is useful for locating no-fly zones.
Before using drones within an educational setting, consult with district administration to evaluate district and school policies, local regulations, and legal implications. Laws surrounding drone use change frequently. For up-to-date information, go to knowbeforeyoufly.org. Information specific to the educational use of drones can be found on the Know Before You Fly Educational Use webpage. The book Drones in Education by Chris Carnahan, Laura Zieger, and Kimberly Crowley provides recommendations and information about classroom implementation.
Prior to teaching the Drones in High-Tech Farming lesson, familiarize yourself with flying the Tello drone and programming using the DroneBlocks App. The DroneBlocks App is free and is compatible with most DJI drones including Phantom 3, Phantom 4, Mavic Pro, Mavic Air, Spark, and Tello.
Engage
 Take the class to a large field free of trees or overhead wires or into a gymnasium.
- Show the students the quadcopter drone. Explain that drones either have fixed wings or rotors. Drones with four rotors are called quadcopters.
- Perform a demonstration of the drone's capabilities including take off, hover, maneuvers in the air, filming video, taking photographs, and landing. (If flying the drone outside, a cardboard, wood, foam, or rubber landing pad is recommended. Long grass can interfere with the drone's rotors.)
- Arrange the students into small groups. Ask the groups to make a list of different ways in which a drone might be useful to people.
- Have each group share their ideas with the class.
- Explain to the students that, in this lesson, they will discover how a drone flies, explore how drones are used in agriculture, and program and operate a drone to survey a field.
Explore and Explain
Activity 1: How Does a Drone Fly?
- Ask the students, "How do drones fly?" After listening to their responses, lead a discussion about gravity and lift. Integrate the following points into the discussion:
- Gravity is the natural force that causes things to fall toward the Earth.
- Lift is the force that directly opposes the weight of the aircraft and holds the aircraft in the air.
- Quadcopter drones use rotors to help the drone lift off the ground and fly.
- As the rotor pushes down on the air, air pushes up on the rotor.
- In order for the drone to fly into the air, a force that equals or exceeds the force of gravity must be created. This is called lift.
- The faster the rotors spin, the greater the lift.
- Turn on a hair dryer and aim it towards the ceiling.
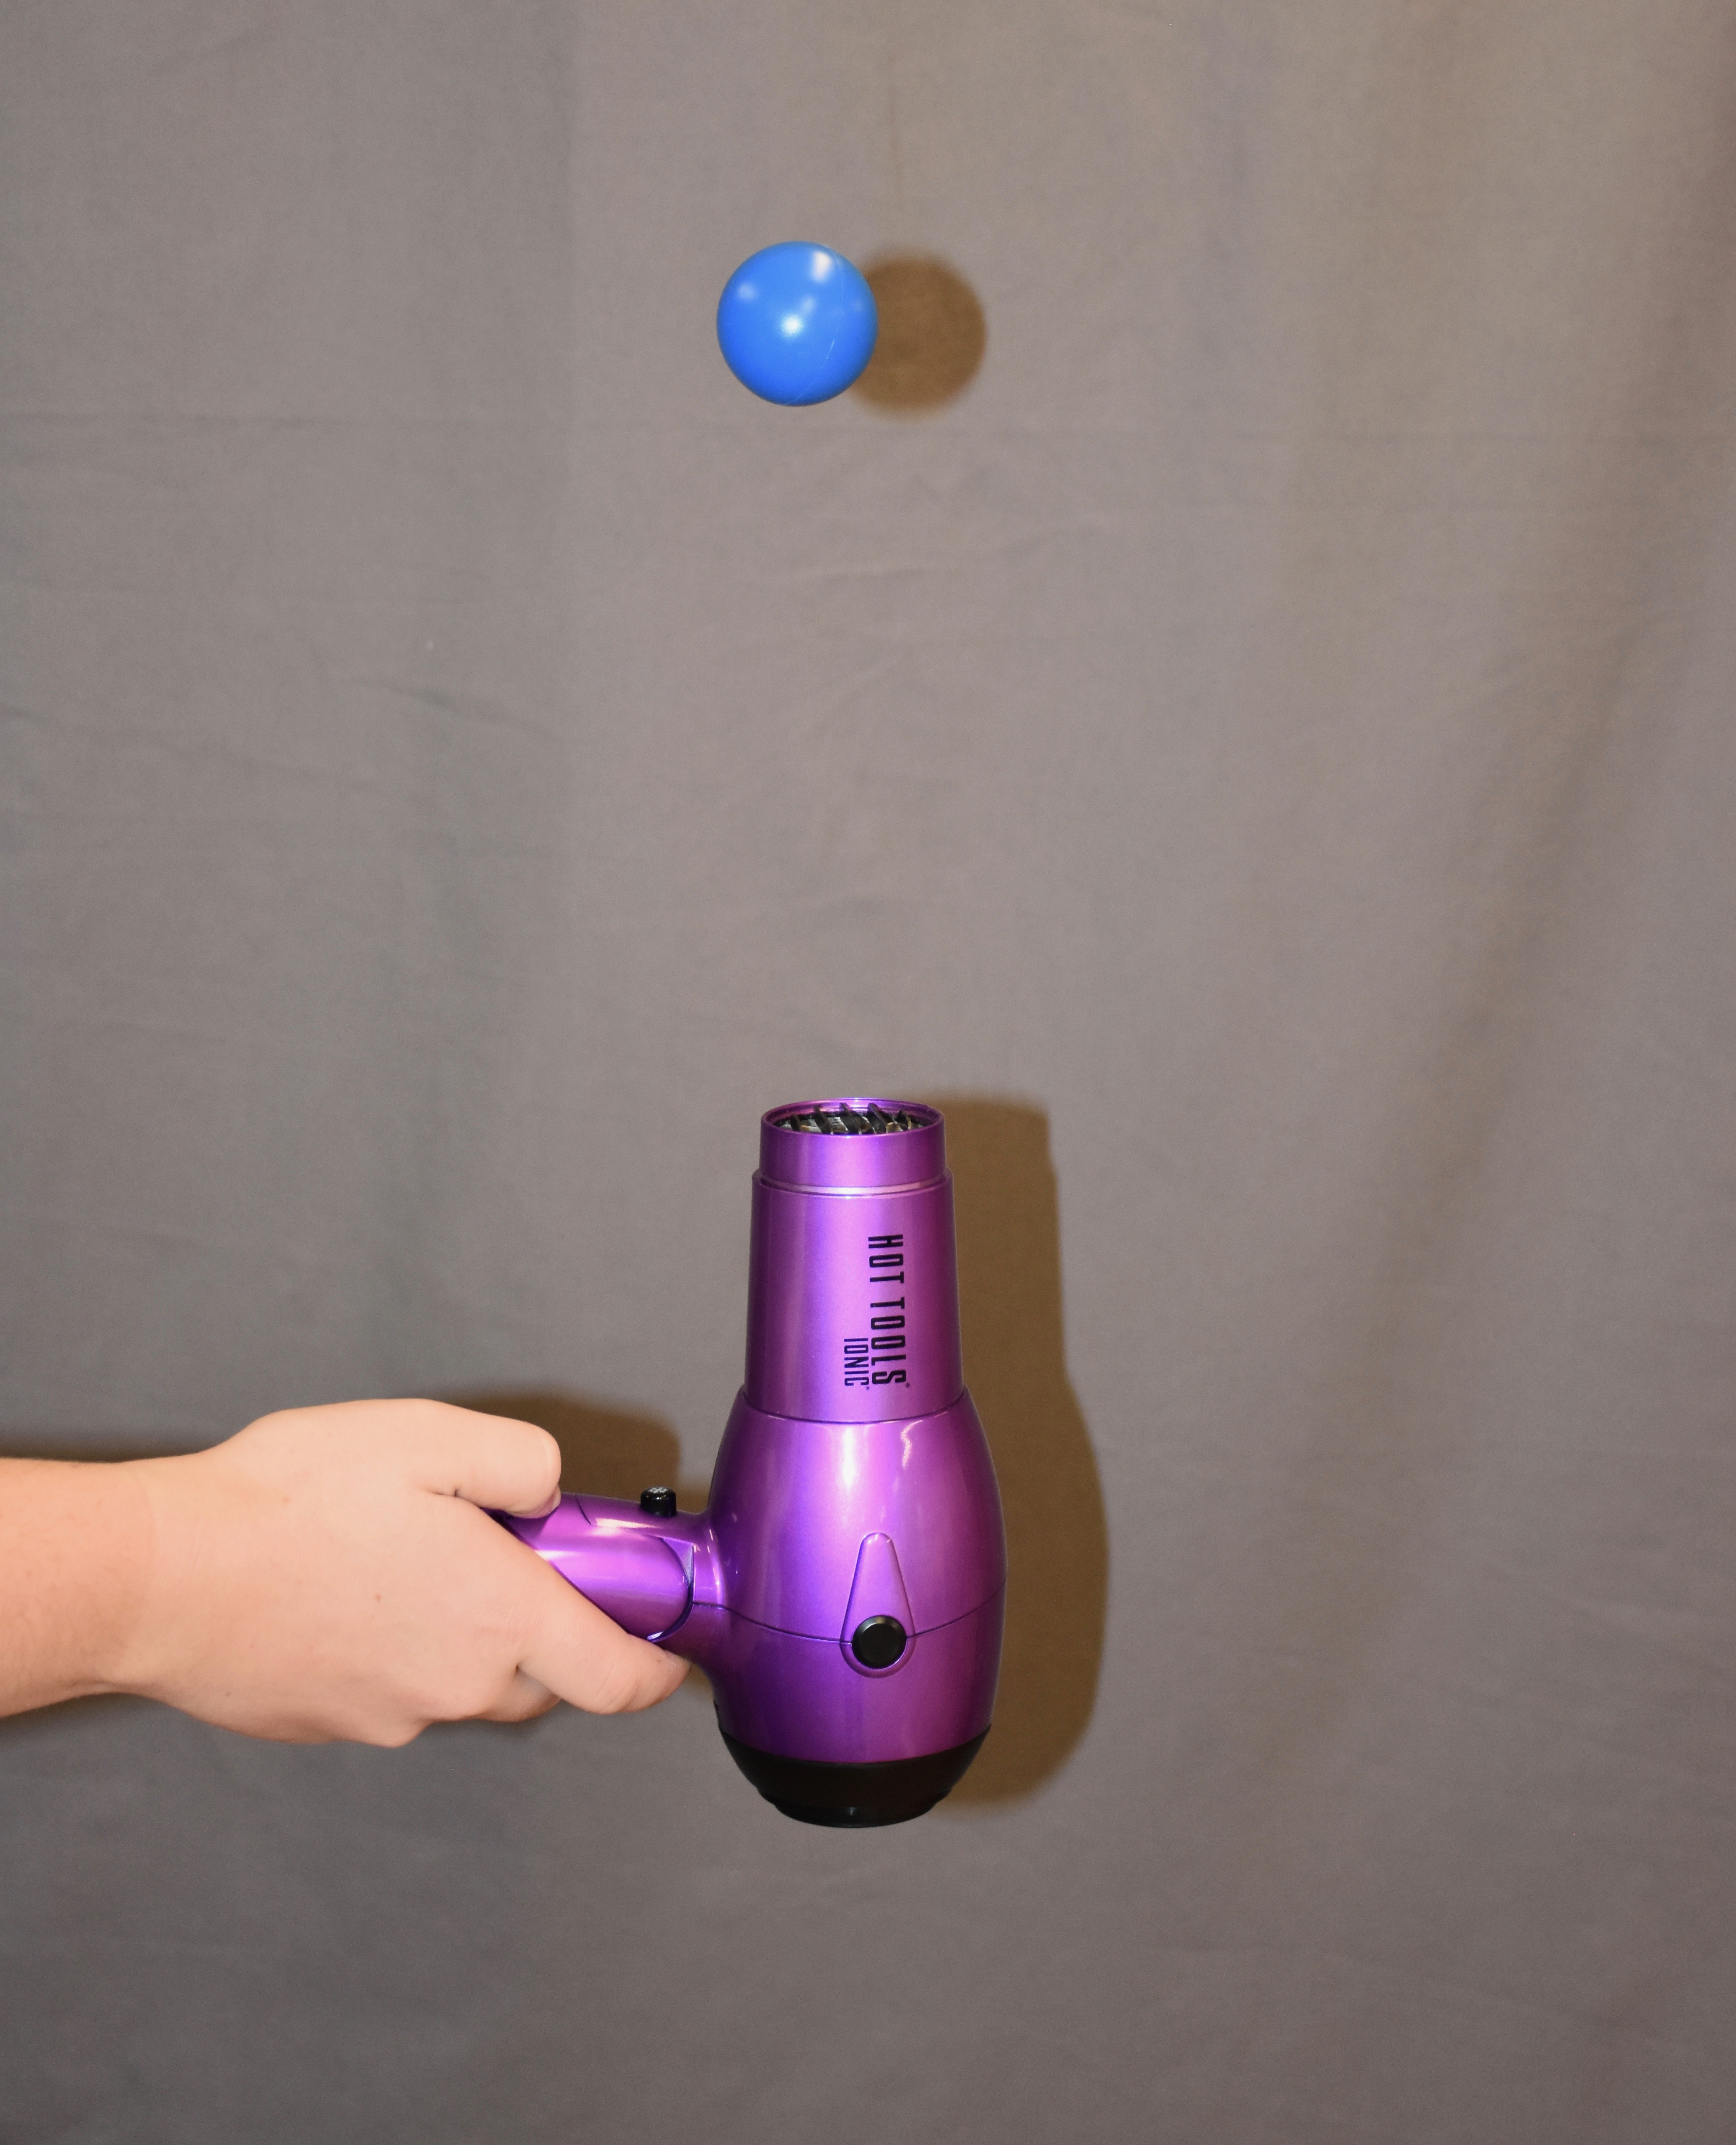 Place a ping pong ball into the stream of air. Ask the students, "Why is the ping pong ball floating?" (The force of the air pushing up on the ball is equal to the force of gravity pushing down on the ball, so the ball is hovering in the air.)
 - Ask the students what they think will happen to the ping pong ball if the hair dryer is turned off. Turn the hair dryer off to show the students that the ball will fall to the ground. Ask the students, "Why does the ping pong ball fall when the hair dryer is turned off?" (The force of the air pushing up on the ball is less than the force of gravity pushing down on the ball.)
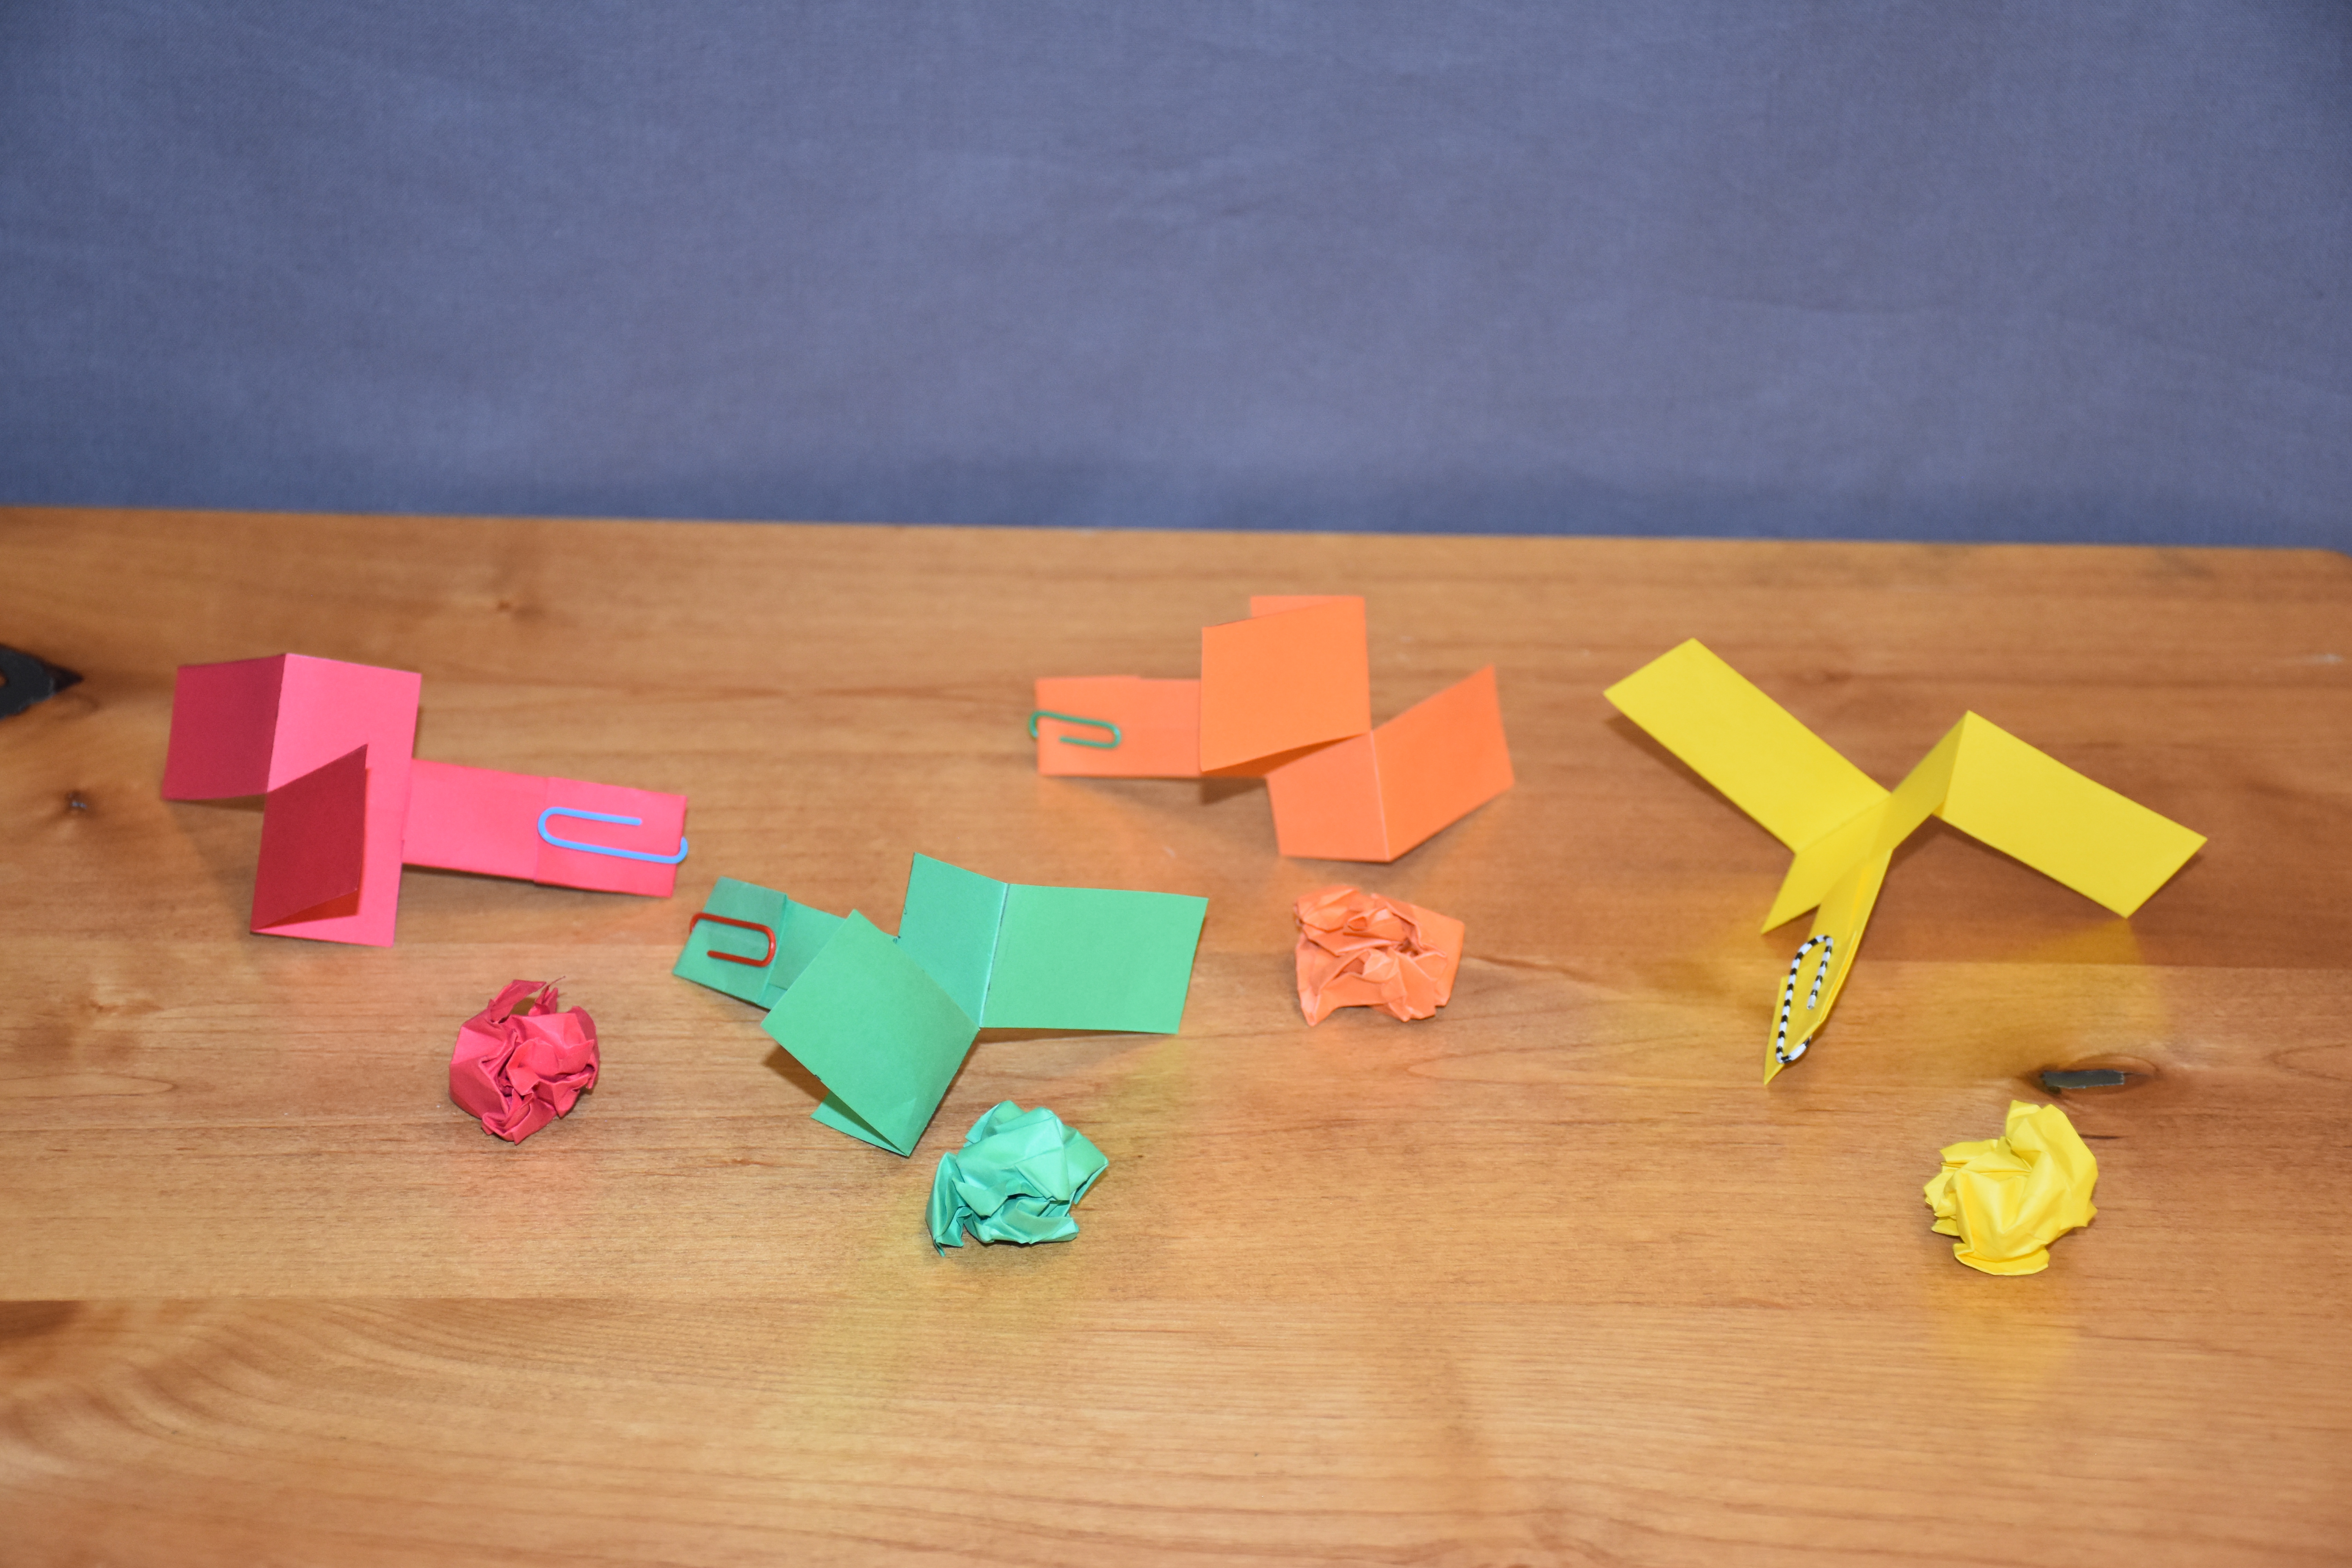
- Hand out two 2" x 6" pieces of paper and a paper clip to each student. Instruct the students to crumple one of the pieces of paper into a ball. Use the following instructions to make a rotor with the other piece of paper.
- Hold the paper so that the 2" edges are at the top and bottom.
- Fold the paper in half vertically.
- Unfold the paper, and draw a horizontal line 2" from the top and a horizontal line 3" from the bottom.
- From the top, cut down the middle fold to the 2" line. Fold one of the flaps forward and the other flap backward on the line to make the rotor's blades.
- On the other line, make a mark 5/8" from the right. Make a cut along the line from the right stopping at the 5/8" mark.
- On the same line, make a mark 5/8" from the left. Make a cut along the line from the left stopping at the 5/8" mark.
- Draw a line from each 5/8" mark to the bottom of the paper. Fold the paper into the middle along each of these lines.
- Draw a horizontal line 1" from the bottom. Fold the paper along this line and place a paper clip on the fold.
- Have the students carefully stand on their chairs and drop their crumpled ball and their rotor (paper clip facing down) at the same time from the same height.
- Ask the students, "Which stayed in the air the longest, the crumpled ball or the rotor?" (the rotor) "Why did the rotor stay in the air longer?" (The design of the rotor causes the blades to spin as it falls through the air. The spinning blades generate enough lift to slow the rotor down.)
- Show the students the rotors on the quadcopter drone. Clarify that, unlike the paper rotor, the drone's rotors are powered by motors that can create and maintain a force that is equal to or greater than the force of gravity. The rotors help the drone lift off the ground and fly.
- Show the students the video How Do Drones Fly? for an explanation of how rotors help drones move in different directions.
- Provide a demonstration about how to fly the class drone using a smartphone or tablet as a remote control. Include an explanation of the safety guidelines listed in the Background Agricultural Connections section of this lesson.
Activity 2: Drones in Agriculture
- Organize the class into three groups.
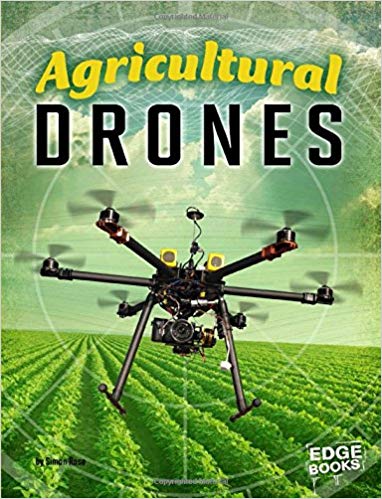 Handout an Agricultural Drones Discussion Guide to each student, and provide each group with a copy of Agricultural Drones by Simon Rose. Assign one group to read chapter 2, one group to read chapter 3, and one group to read chapter 4.
 - After reading their assigned chapter together, have each group discuss the chapter and work together to complete the corresponding section of the Agricultural Drones Discussion Guide.
- Reorganize the class into groups of three students that include a representative from each of the three chapters. Each representative should take a turn summarizing their assigned chapter and help the rest of the group complete that section of the Agricultural Drones Discussion Guide.
- After the discussion guides have been completed, lead a class discussion about general crop problems. Integrate the following points into the discussion:
- When insect pests eat crops, the plants do not thrive. Pesticides are substances used to destroy harmful insects.
- When weeds invade crops, they compete with the plants for water, nutrients, and sunlight. Herbicides are substances used to destroy weeds.
- When plants do not receive enough water, they wilt and eventually die. Irrigation is the application of controlled amounts of water to plants.
- When plants do not receive the proper nutrients, they grow slowly and turn yellow. Fertilizers are substances that supply nutrients to plants.
- Pesticides, herbicides, and fertilizers can be part of either organic or conventional farming practices, depending on the specific types that are being used. (For more information about organic and conventional farming practices, see the lesson An Apple a Day Keeps the Doctor Away.)
- Have the students capture the discussion information by creating a "Crop Troubleshooting Guide" which will be used in Activity 3. Provide each student with a blank 8 1/2" x 11" piece of paper. Fold the paper so that the top edge meets the left edge and forms a point at the top left corner. Cut off the excess paper strip at the bottom. Open the paper to make a square and then refold it the opposite way. Open the fold to reveal an X fold pattern. Fold each corner to the center point of the X to form a small square. Turn the square over and write the title "Crop Troubleshooting Guide" and your name. Turn the guide back over to the side with the four tabs.
- Provide each student with a copy of the Crop Troubleshooting Cards. Instruct the students to cut out the cards. Have the students use their glue sticks to attach the title card "Crop Troubleshooting Guide" to the back of the square (the side without tabs). Ask the students to match each of the four problem cards (bold font) with the corresponding solution card and the solution description card. Glue the problem cards on the outside of each tab, the solution cards on the inside of the tabs, and the solution description cards underneath the tabs so that the following information is captured:
- Outside tab 1: Insects are eating
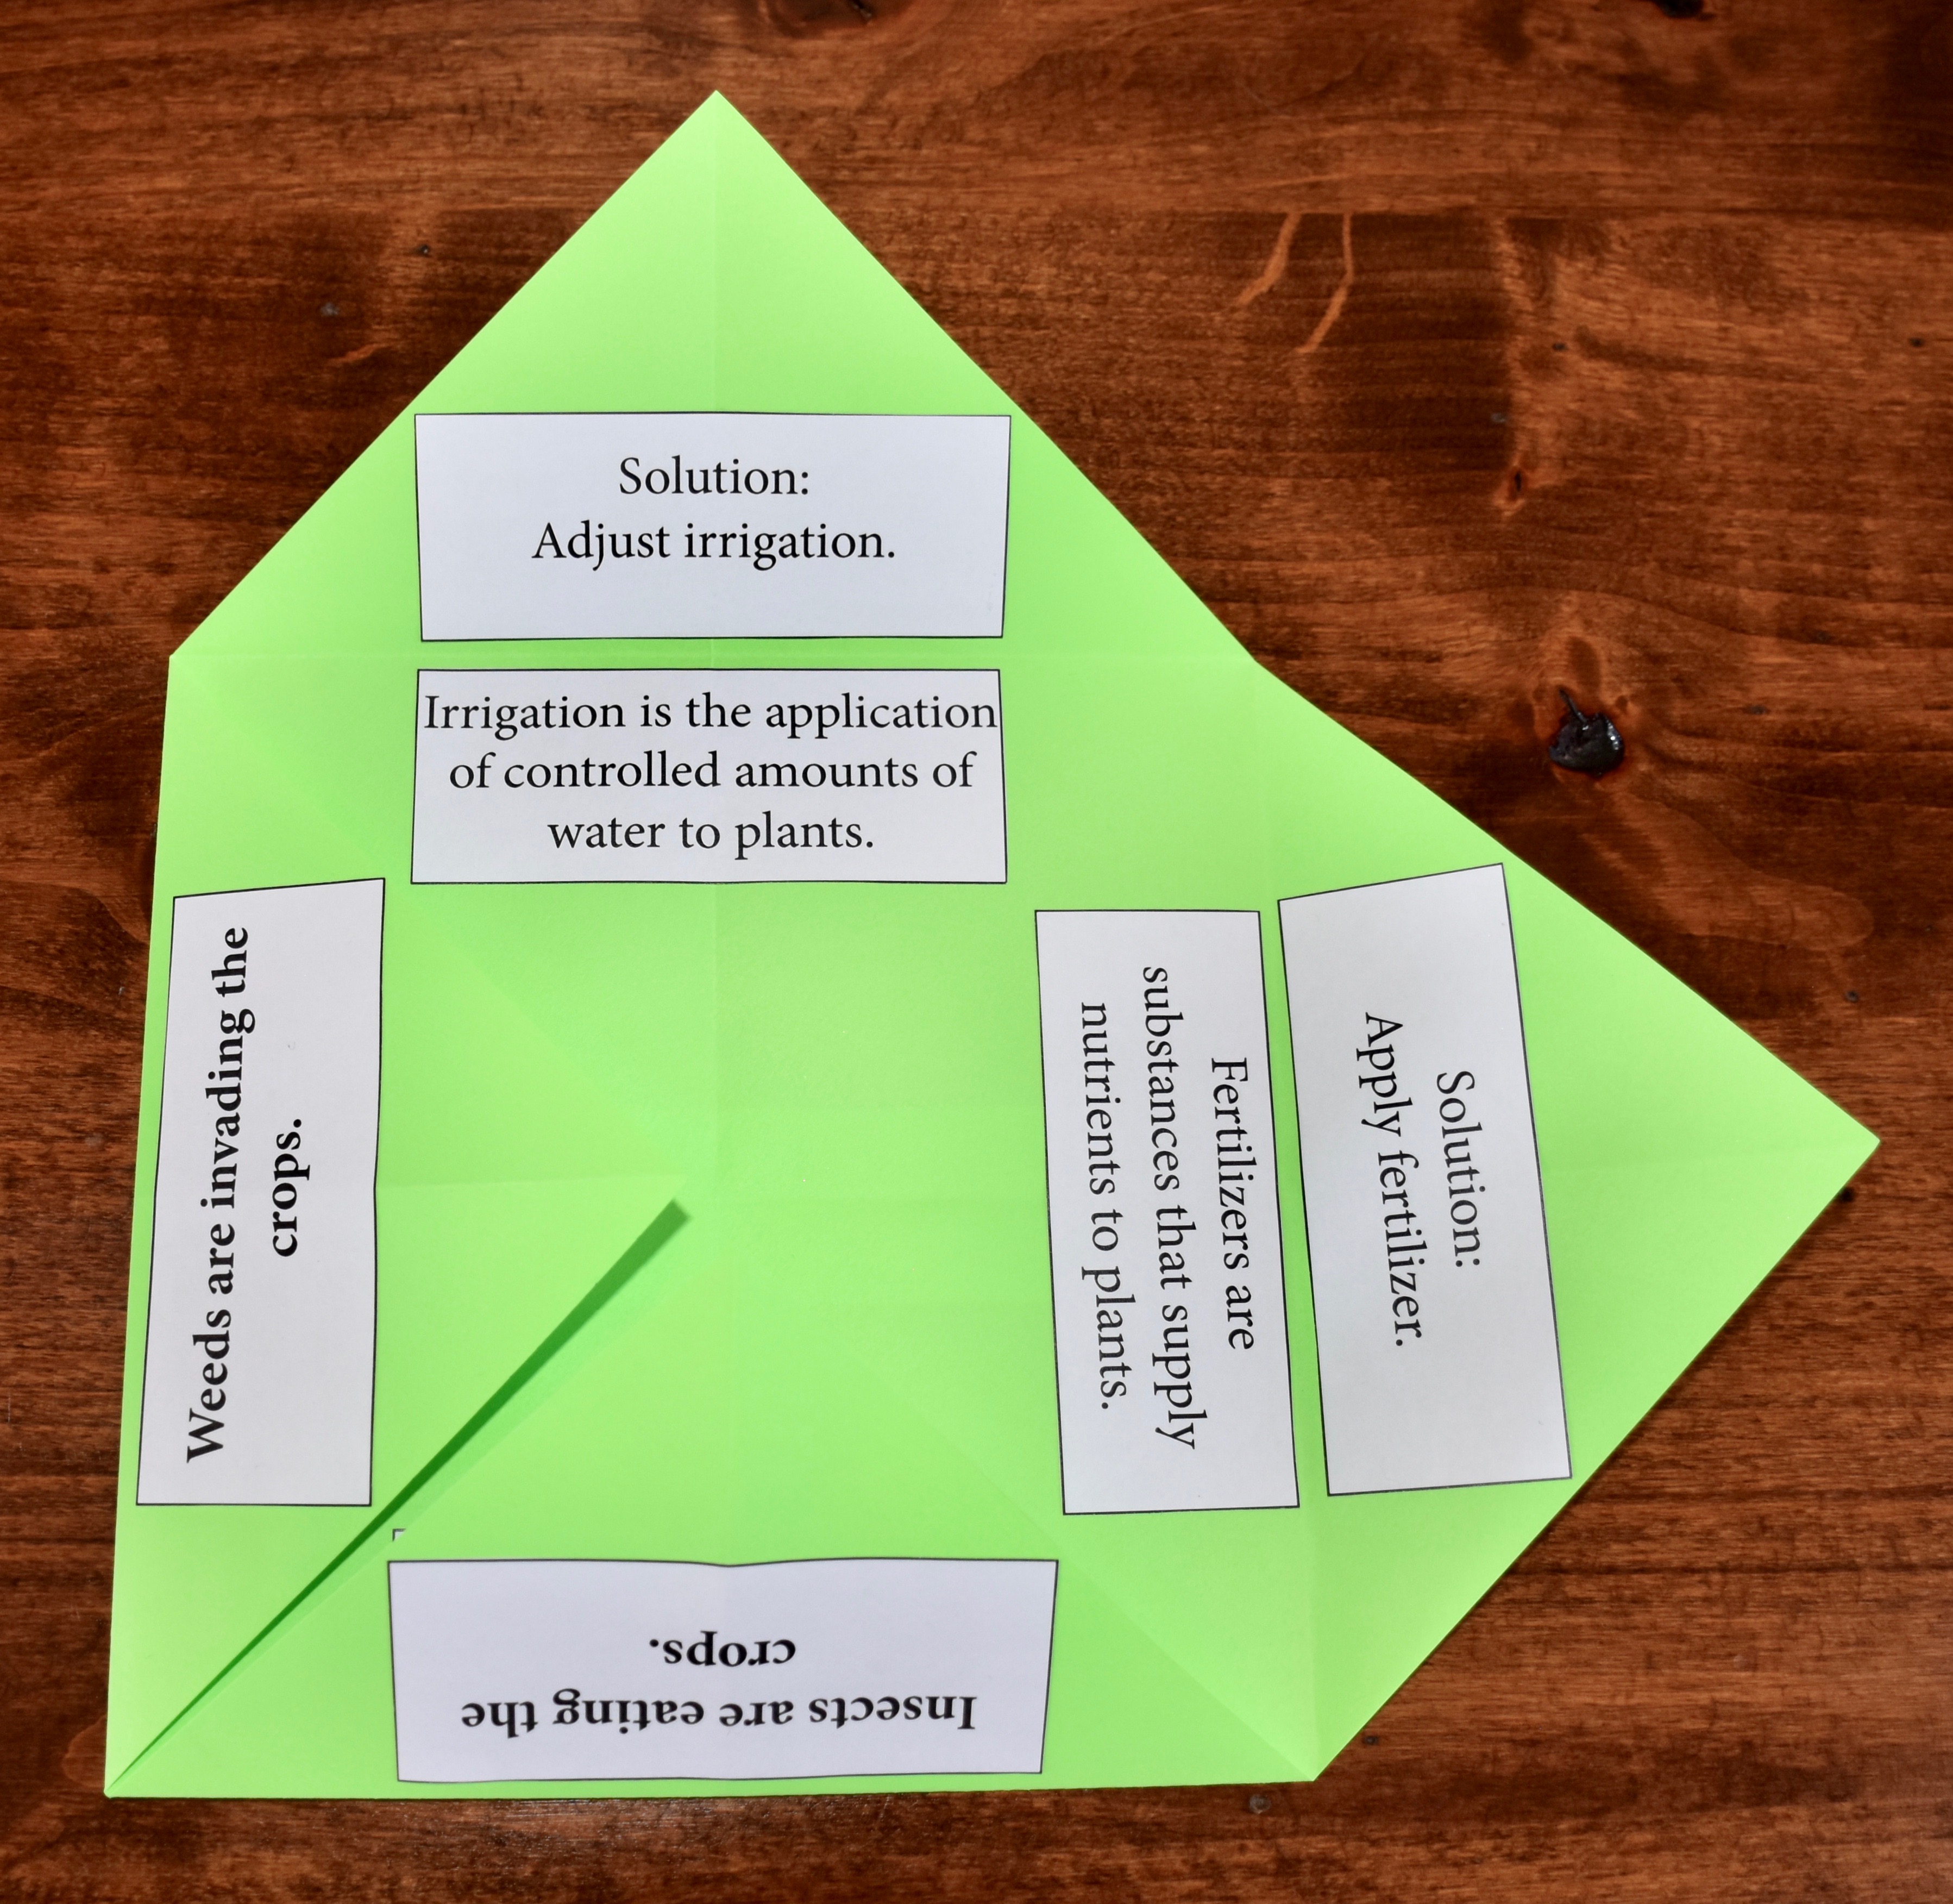 the crops.
Inside tab 1: Apply pesticides.
Underneath tab 1: Pesticides are substances used to destroy harmful insects. - Outside tab 2: Weeds are invading the crops.
Inside tab 2: Apply herbicides.
Underneath tab 2: Herbicides are substances used to destroy weeds. - Outside tab 3: The crops are wilting.
Inside tab 3: Adjust irrigation.
Underneath tab 3: Irrigation is the application of controlled amounts of water to plants. - Outside tab 4: The crops are growing slowly and turning yellow.
Inside tab 4: Apply fertilizer.
Underneath tab 4: Fertilizers are substances that supply nutrients to plants.
- Outside tab 1: Insects are eating
Activity 3: Drone Mission
- Prior to beginning Activity 3, identify a large, rectangular field or gymnasium to represent a farm field. Place four pieces of poster paper onto different spots on the field or gymnasium floor. Attach a Crop Problem Sign onto each poster.
- Hand out a Drone Mission Activity Packet to each student. The students will also need their "Crop Troubleshooting Guides" from Activity 2.
- Summarize the farming challenge from chapter 1 of Agricultural Drones by telling the students, "Imagine that you are a farmer, and you are having a problem with your crops. Some of the plants are not growing well. Your fields are very large. You do not have time to walk through the entire area to check your plants. You're not sure what is causing the problem. You need more information before deciding what to do. Luckily, you have a drone. You will need to program a flight plan for the drone and take aerial photographs and videos of the problem areas. Examine the images captured by the drone's camera to identify what is causing the problems, and determine how to manage your crops."
- Model for the students how to video the field by flying the drone around the rectangular perimeter of the "farm field" using the following manual commands:
- Turn on the Drone video.
- Begin takeoff in the bottom left corner of the rectangular field.
- Yaw right 90°.
- Fly left to the top left corner of the field.
- Yaw right 90°.
- Fly left to the top right corner of the field.
- Yaw right 90°.
- Fly left to the bottom right corner of the field.
- Yaw right 90°.
- Fly left to the bottom left corner of the field.
- Land in the bottom left corner of the field.
- Turn off the drone video.
- Organize the class into groups of four students. Have the groups use the video footage to map out the "farm field's" problem areas on their Drone Mission Activity Packet and assign a number 1-4 to each problem area on their map.
- Explain to the students that the mission you modeled for them was flown manually using a remote control (smartphone or tablet). Sometimes farmers manually fly drones over their fields. Other times farmers program flight plans so that the drone can repeat flight paths without having to be flown manually.
- Explain to the class that they are going to work in their groups to create a flight path around the perimeter of the field. Have the groups choose from the flight commands in the Drone Mission Activity Packet to create their flight path. The flight path should meet the following requirements:
- The drone may begin at any location along the perimeter of the field.
- The drone must take off and land at the same location.
- The drone's camera must face the farm field throughout the flight. (Students will not have the ability to capture video or photographs during the programmed flight.)
- The drone must fly around the entire perimeter of the field one time.
- Check each group's flight plan for any commands which could result in an unsafe situation or damage to the drone. Have the groups make any necessary adjustments.
- Have each group enter their flight plan into the DroneBlocks App by dragging, dropping, and connecting the command blocks.
- Allow time for each group to test their flight plan by launching their mission around the "farm field." The groups should check the boxes in step 2 of their Drone Mission Activity Packet for each requirement that was successfully met during the test. Adjustments should be made and tested until each box can be checked off.
- Tech Tip: On occasion, the Tello drone will fail to respond to a particular programmed command from DroneBlocks. Adding a 2 second hover before the failed command may solve the problem. The DroneBlocks Community on Facebook can be a helpful troubleshooting resource.
- Have each group take turns manually flying the drone over the field and take an aerial photo of each problem area. Each student in the group will fly the drone over and photograph one of the four problem areas. The first person will fly over and photograph problem area 1, the second person will fly over and photograph area 2, and so on.
- Examine the photographs to identify the crop problems. Consult the "Crop Troubleshooting Guide" from Activity 2 to find solutions for the crop problems, and record the problems and solutions on the Drone Mission Activity Packet.
- As a class discuss the benefits of using a drone to have a birds-eye-view of a farm. Integrate the following points into the discussion:
- Farmers can monitor large fields that would be difficult to monitor on foot.
- The birds-eye-view of a drone can improve production, efficiency, and yields by identifying small problems before they become big problems.
- Solutions can be applied with precision and accuracy saving time, money, and resources.
Elaborate
-
View the videos Cow Art with a Drone, #CowPi, and #CowHeart to explore the creative uses of drones on farms.
-
View the Public Safety Announcement (PSA) videos San Francisco 49ers Tackle Drone Safety, Aerobatic Pilot Sean D. Tucker has a message for you about Drone Safety, and Airline Captain Brad Lang explains the rules for flying drones safely to learn more about drone safety.
-
For students with access to a 3D printer, consider designing and printing drone parts and attachments. Search thingiverse.com for design inspiration.
-
Encourage the students to make modifications to the paper rotor design. Hold a competition to see which modified rotor stays in the air the longest.
Evaluate
After conducting these activities, review and summarize the following key concepts:
- A drone is an unmanned aircraft guided by remote control or onboard computers.
- In order for a drone to fly into the air, a force that equals or exceeds the force of gravity must be created. This is called lift.
- Drone applications in precision agriculture include mapping, surveying, monitoring, planting, crop dusting, and spraying.
- Agricultural drones can increase yields, save time and money, and assist with animal and crop monitoring, planning, and management.
Sources
- http://www.thedrive.com/tech/18456/drones-in-agriculture-how-uavs-make-farming-more-efficient
- https://www.microdrones.com/en/content/drones-and-precision-agriculture-the-future-of-farming/
- https://www.dronefly.com/blogs/news/how-are-drones-used-for-agriculture/
- https://www.wired.com/2017/05/the-physics-of-drones/
- http://knowbeforeyoufly.org/learn-the-drone-laws/
- https://www.kqed.org/science/16676/drones-the-newest-water-saving-tool-for-parched-farms
- http://www.softschools.com/facts/technology/drones_facts/3355/
Recommended Companion Resources
- Agricultural Drones
- Agricultural Inventions: At the Top of the Field
- Agriculture Technology Advancements Video Playlist
- Drones and the Future of Farming Video
- Farmall in the Family with Casey & Friends
- How Drones are Helping to Plant Trees - A Cleaner Future
- The Magic School Bus Rides Again: Robot Farm
- What Happens When Farming Goes High-Tech?
Author
Organization
 |
We welcome your feedback! If you have a question about this lesson or would like to report a broken link, please send us an email. If you have used this lesson and are willing to share your experience, we will provide you with a coupon code for 10% off your next purchase at AgClassroomStore. |